
Elements of design are the building blocks of art for good reason. They also happen to work when it comes to planning and laying out your kitchen. Whether you are all about luxury or bound to the basics, awareness of these fundamentals can make all the difference.
Read moreOne Bachelor's Kitchen Makeover
So you need a new kitchen. Let the dreams commence! We read all about the ubiquitous “dream kitchen”. The gorgeous kitchen above may be found on Houzz.com and features cabinets by Holiday Kitchens. Sorry if you thought it was the after shot. Sadly, it is not but I think you'll agree that we made a huge improvement. To be sure the heart of the home is the most expensive room in the house to remodel so how much do you need to do? Do you need to reinvent the wheel to be happy? I say no.

Take a look at this typical example. This kitchen is in a classic Florida ranch style, 3 bedroom 2 bath abode circa 1978.  Do you think it needed a new kitchen? Here’s the scenario: The owner is a bachelor with a teen-aged daughter who lives with him part-time. It’s a small kitchen. We’re not changing the flooring and you don't have to. Just remember to make sure that new cabinets will cover the old "foot print" of the kitchen. Your installer should shim cabinets, as needed, so everything's nice and level. Basically this client was due for fresh new cabinets, tops and appliances. He actually likes to cook and his favorite appliance is his GE Advantium Speedcook Microwave Oven, so much so he wants two! Oh, and he wants a cabinet that is easy to access from the porch because he grills a lot. We used Holiday Kitchens for the cabinetry (same resource used for the gorgeousness at the top of the page).
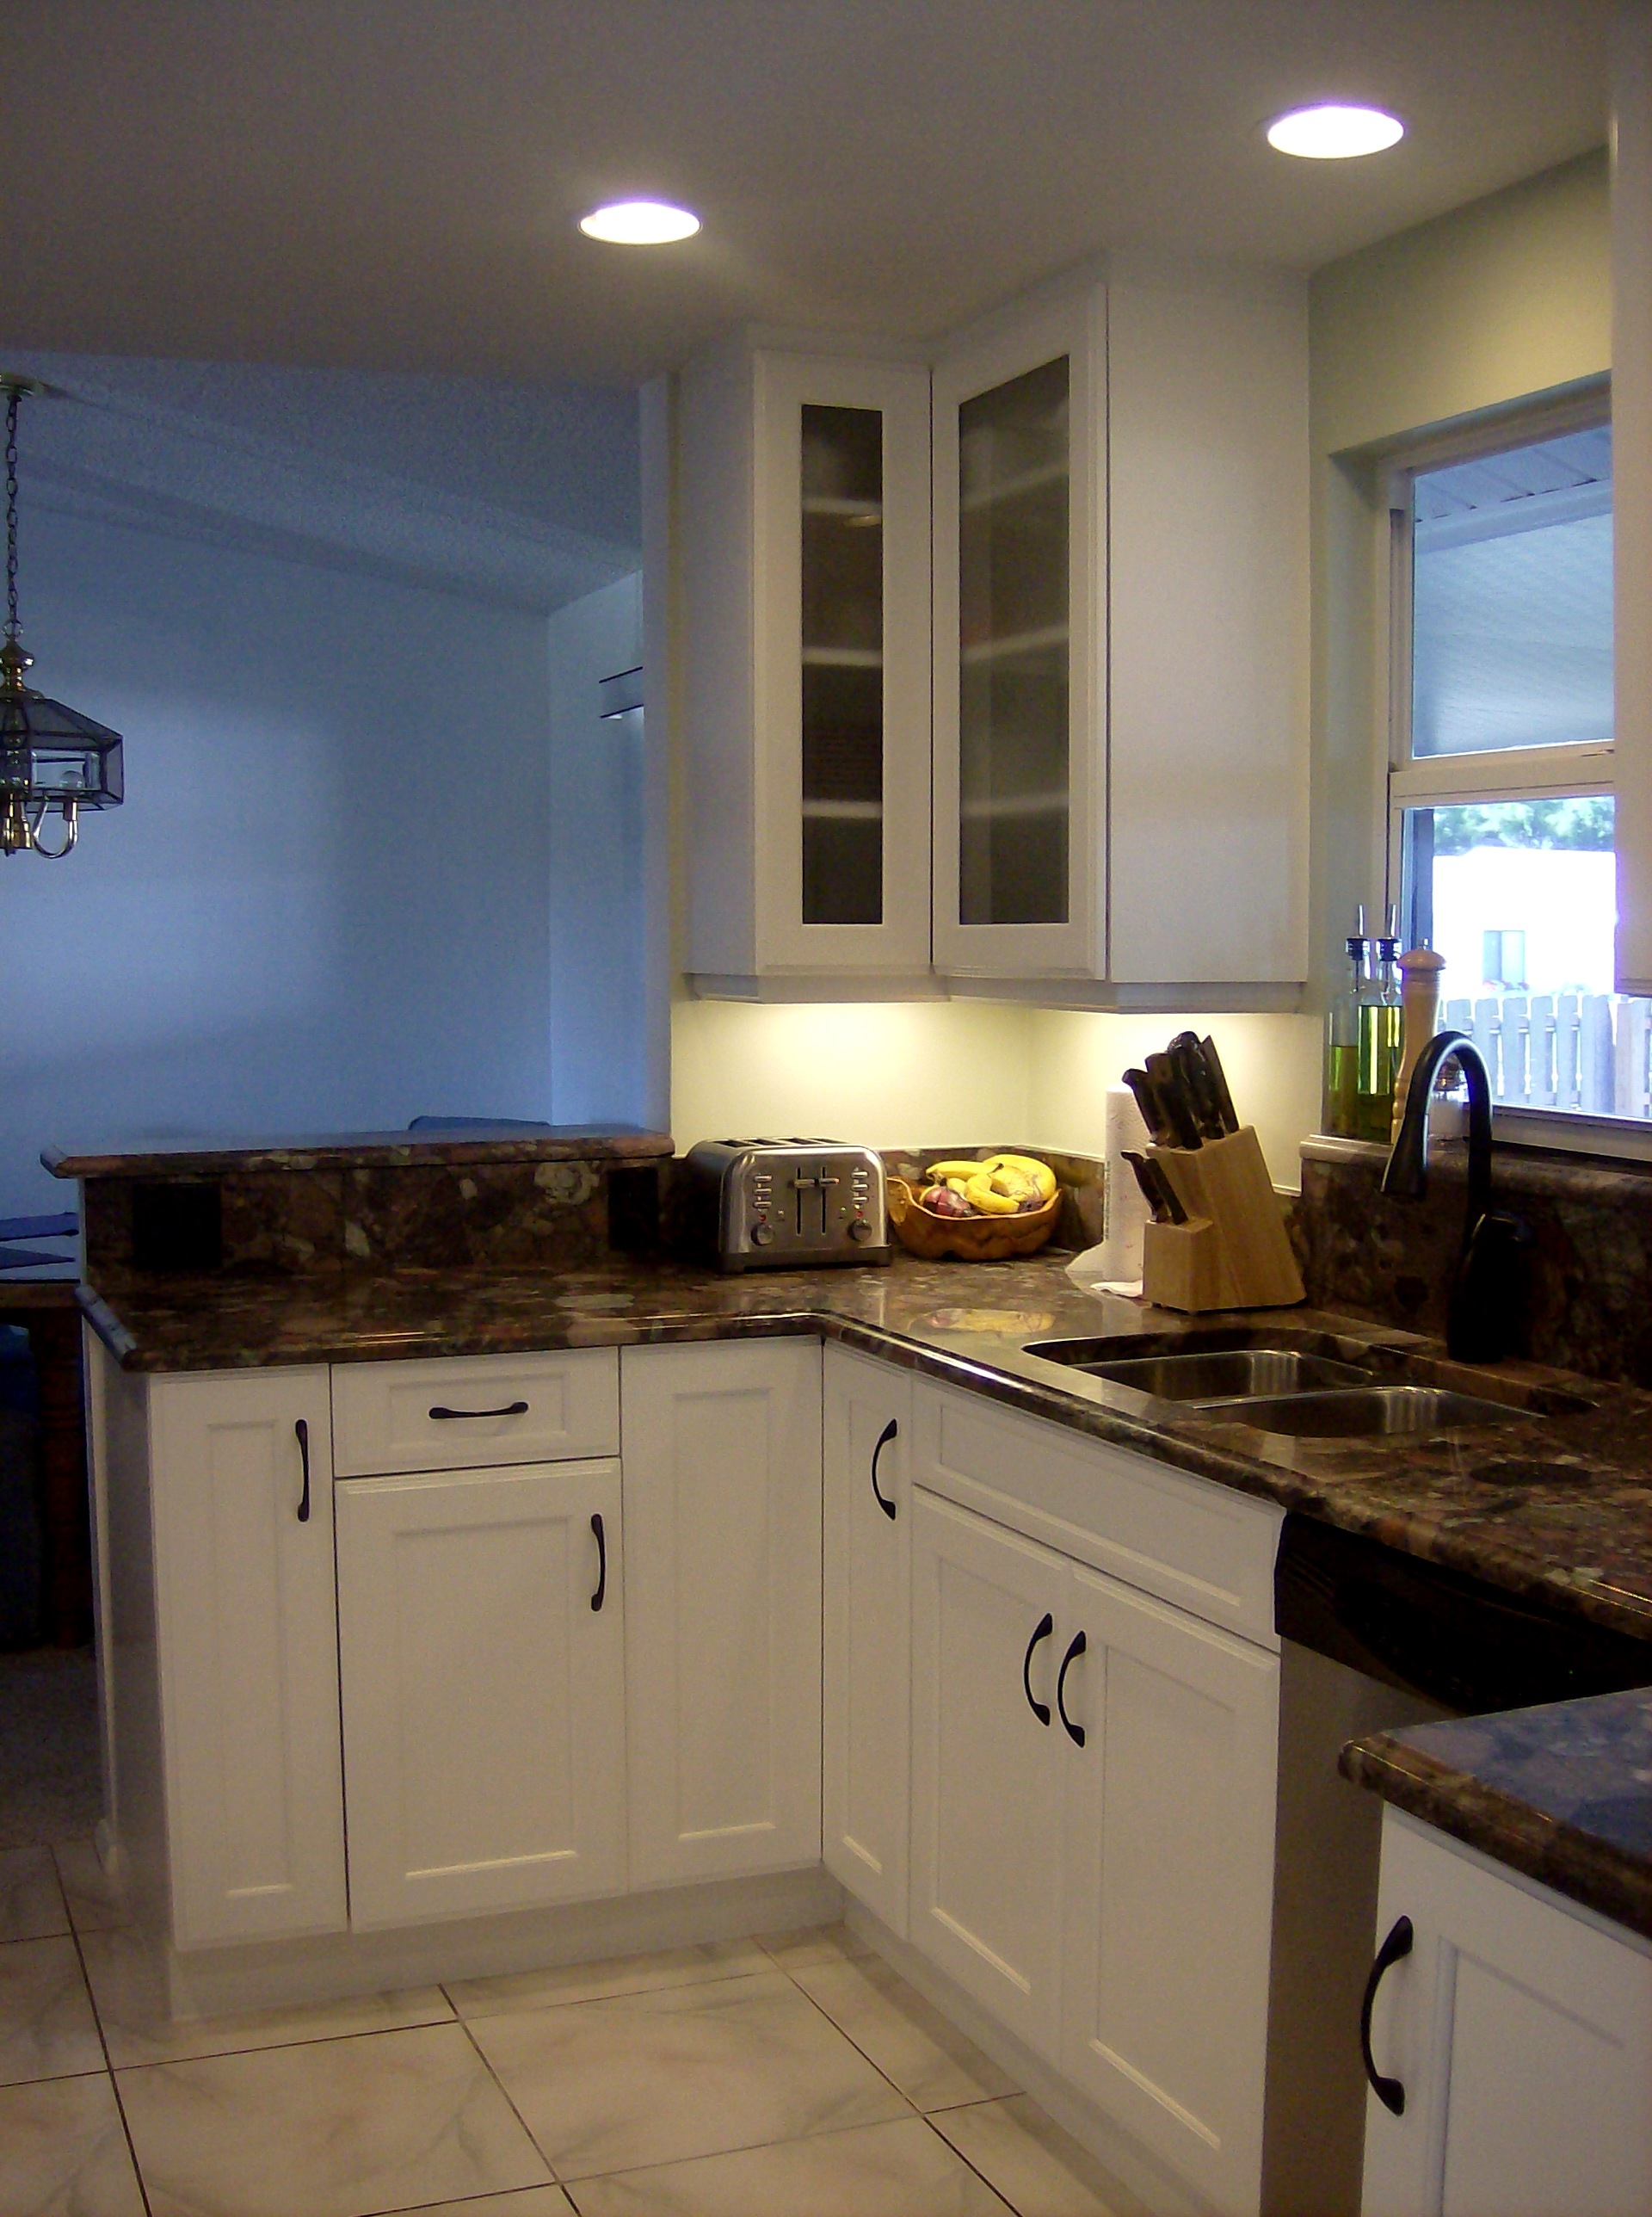
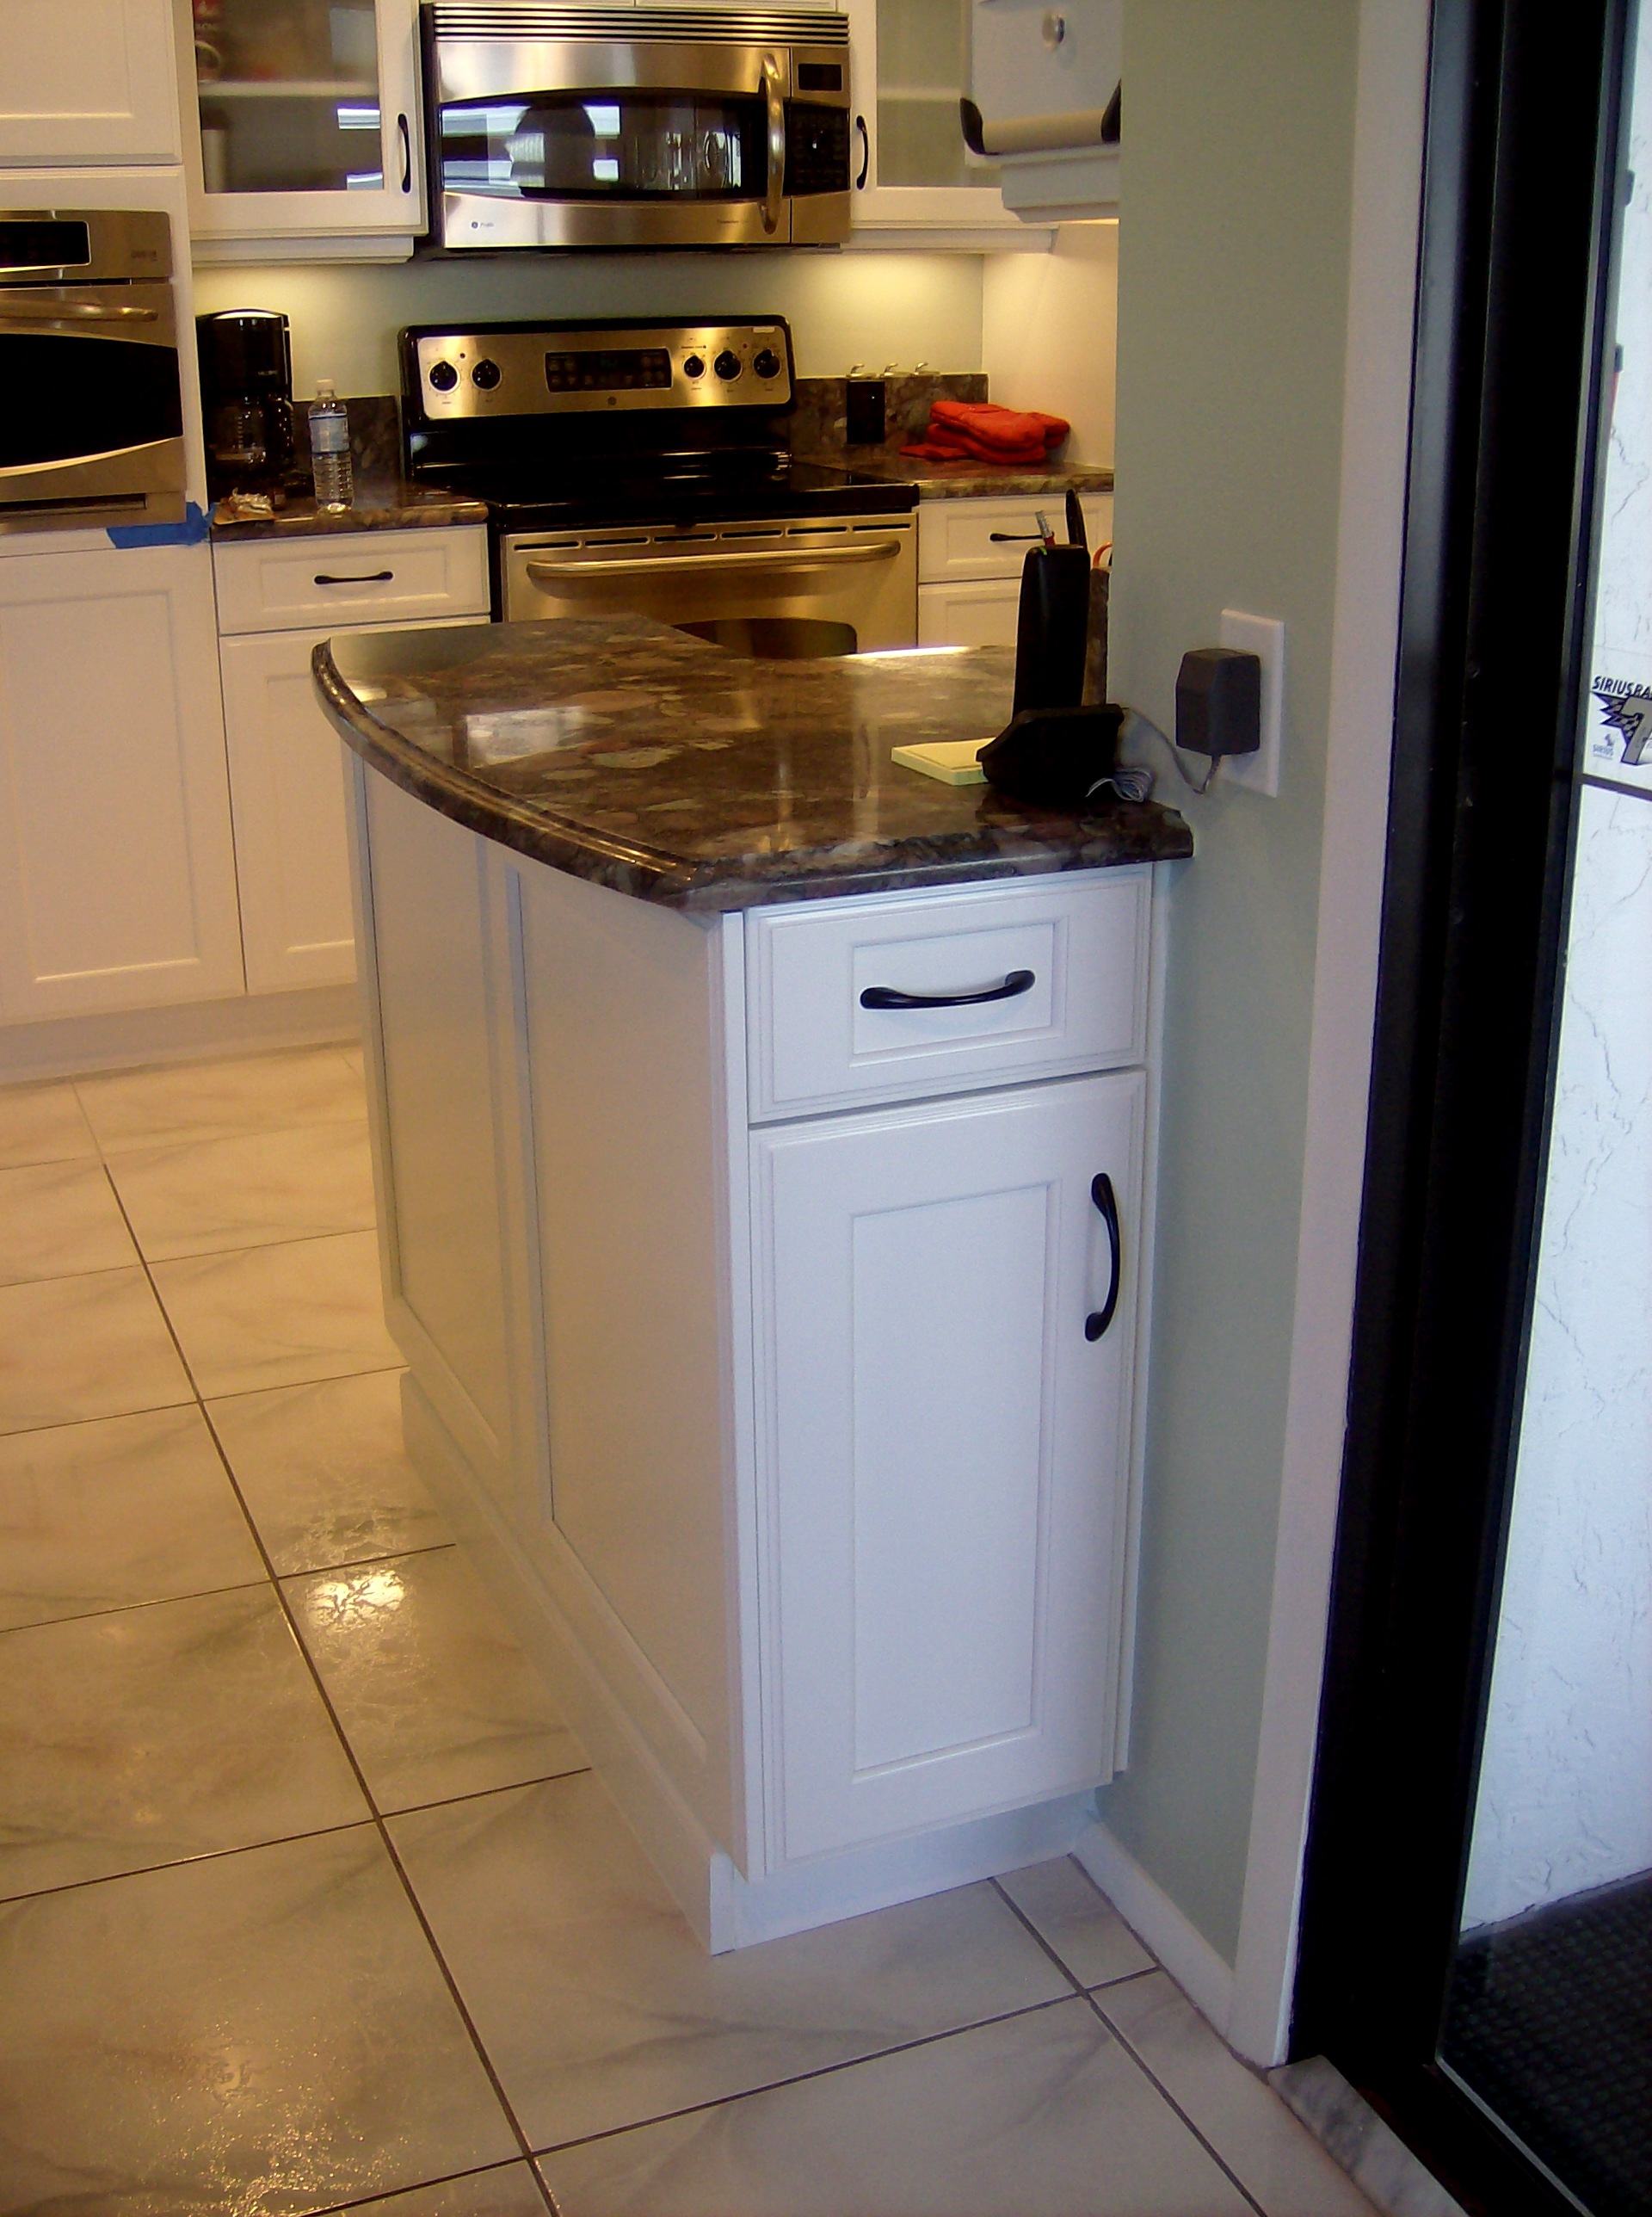 You may know Holiday Kitchens for their higher end custom cabinets but they also offer a really good quality cabinet in a middle-of-the-road price point. Laminate tops were replaced with durable granite by Stone Palace and we fit that extra microwave in a tall cabinet with pantry storage above and below. Nothing crazy just nice and new.Next up: Can healthy chips taste good? We had fun finding out!
MY DESIGN PROCESS: A CASE STUDY
I write about a lot of varied things on this blog. Today I'm going to open my mind to you so you can step inside the creative (or whatever you want to call what goes on in there) process, as it pertains to cabinet design. The thing about designing kitchens and baths is that it doesn't only require vision in the aesthetic sense but also in the functional sense. We have to be creative in terms of the space constraints while being very aware of function.
 WHAT HAVE WE HERE? This is a nursery equipped to serve the nanny. She's got an under the counter refrigerator to store bottles, baby food and
 wine whatever she wishes for herself. In addition there is a small sink and a microwave. There is also storage and counter top work space (underneath all the debris). That's a lot of function packed into less that six lineal feet! The lucky owners of this oceanfront abode are away for the summer, as is the custom in Palm Beach.MY ASSIGNMENTI have been asked to replace this set up but to keep the same foot print and function. The cabinets are to be more in keeping for this traditionally styled beach house.MY OBSERVATIONSThe backsplash (area between counter and upper cabinets) is really high, about 22". Not only does this mean less cabinet space but it's a bit of a stretch unless you're a very tall nanny. In addition, there is nothing tying the upper cabinets to the lower cabinets and since they do not go wall to wall it looks as if the uppers are just hanging out, hovering over the base cabinets, not a great look. In general the layout is off kilter. The microwave requires a deeper cabinet and it sticks out unattractively on the left.WHERE DO I START?The appliances are old and will appear even older surrounded by new cabinets. Remember that if you are investing in a new kitchen it's penny wise and pound foolish to try to build your new cabinets around your older appliances. I will suggest that we replace the microwave with a small built-in model in stainless steel. For this I know I must use a minimum of 24" out of the 70" I have available. The refrigerator is important too. This one is old and it's an odd size, about 19". The new one will have to be 24" and I will reccommend that we build it in for a more custom look and to unify the small space. These types of built-in panel- accepting- under- the- counter refrigerators are either 15" wide or 24" wide. I certainly can't detract from the function by going smaller so I will give them more refrigerator space by going with 24" wide. Now that I know what I'm doing with the appliances I will work the cabinet layout around that. Here's phase one showing the larger ref, a built-in micro and an attempt to even things up and connect the uppers to the bases but it's still not quite there yet. I usually draw a free-hand sketch to work out my initial thoughts. The final solution (I drew it using Chief Architect) is to use 42" upper side cabinets instead of the existing 30" uppers. Then since the microwave needs a deeper cabinet (15"), I moved it to the middle and raised it up to create some design interest and to take advantage of the tall ceiling. I made the side backsplashes 16" high with the center at 19". I centered the 24" upper microwave over a 21" wide sink cabinet which allows the bigger refrigerator on the right and does not lessen the size of the existing drawers on the left. I'll need a minimum of 3/4" panel to the right of the ref. That makes a total of 24 3/4" with ref and panel. I will duplicate that on the left making the 4 drawer cabinet 24 3/4" wide as well. This allows the upper side cabinets to be equal at 23 1/4" each. Last but not least, I am going to suggest using matching wood beadboard above the 4" backsplash to tie the uppers to the lowers and add a small crown moulding on the top to finish it off.

 PRODUCTSHere are the goods and why I picked them:Kholer faucet K7342 in brushed nickel finish- It's a traditional faucet in a finish that will blend with the stainless steel of the microwave. The height makes it user friendly yet it will fit perfectly in the space.

Kohler undermount entertainment sink K5848- I love the shape of this sink. I double checked the size and it fits in our 21" wide cabinet. It's a more updated undermount model but it's still cast iron. I'm specifying Biscuit to go with the cabinets but I will also suggest a stainless option which would also work.

SHARP R1214OVER THE COUNTER MICROWAVE- This model fits into our 24" wide space. It requires a 15" deep cabinet, check. It has a light below and I happen to know that Sharp makes a kick-ass microwave. CABINETS BY HOLIDAY KITCHENS- flat panel with applied moulding. Finish, selected by designer, to be Snowdrift paint with Mink Wash. I chose Holiday cabinets because we have some custom size requirements and I can order Holiday in fractional increments. They also offer a wide array of finishes and door styles which is important in a higher end application.
 U-Line Under the counter refrigerator - This model offers an overlay trim kit option which will allow us to apply a door panel to match the cabinets.What do you think? You see there's no mystery behind the magic of design. Those are the steps in a nutshell. I would love to walk you through the steps of your own potential magic. It's really a lot of fun when it all comes together, kind of like solving a puzzle AND you get to continue to enjoy it everyday!
CREATING AN INSPIRING WHITE KITCHEN
 Today's Let's Blog Off topic queries the source of our ideas. Where does creativity reside? Is it within or is it outside and all around awaiting discovery? For me the answer is both. Yes, it's all around us, for sure, but it also requires the eye of the beholder to breathe life into it. Here is a recent example in my life of something I saw which inspired a blog post.You may have the panache to pull off a monochrome white room that invites and stimulates the senses but for most of us going all the way with white runs the risk of BORING. Since white is so "white hot" at the moment, especially in the kitchen, I’m going to share with you the secret of how to make white pop.One thing to remember is white is a team player, it’s all about the colors around it. As you know, I love art (a big source of inspiration). I recently came across this image in Cloth Paper Scissors Magazine which is a perfect example of how white can glow when surrounded by the right color. I see it work time and again. White cabinets plus color equals stunning. If your taste runs more to the conservative think camels, taupes or warm beige walls to create the contrast.
 If you’re more daring go for Apple Martini Green or Sky Blue. The nice thing is if you want to go for the gusto paint is a safe bet. It’s one thing you can change fairly easily and reasonably.
 Another thing to remember about white is that it’s just not white. There are probably hundreds of whites and they all read differently depending on your lighting and location. The lesson here is to test your whites on site. Consider the color for a full 24 hours so you can see how it looks as lighting changes throughout the day.
 Many times wherever you find white you will also find black. You can tastefully mix black and white cabinets or if you have guts and great lighting the walls could be black, as in this example. This photo also serves as a great inspiration for many of the newer homes we have in my area with cathedral ceilings but short stumpy cabinets (thank you Mr. Builder). If you can't afford to change the cabinets take advantage of the great space above for art. Here, it carries the eye upwards taking attention away from shorty cabinets.
 This stunning Apple Green back splash looks like glass but it's actually a colored plastic by Opticolor! So there you have it, inspiration of the day all inspired by a whimsical little piece of art!
ONE FLORIDA KITCHEN WITH A TWIST
 I can’t believe I’ve been back a week already! I guess it’s time to refocus on Florida. What better way than to share this kitchen from my portfolio? Yes, it is the quintessential “Florida” kitchen but you don’t have to live in Florida to have one. If you have a yearning for the tropics year-round, this could be the perfect
 storm (poor choice of words) solution for you. This combination of white, stainless and shades of blue green that call to mind the ocean make this a Florida dream kitchen that you can apply to your own home. I always say the best projects are the result of great collaboration and this beautiful kitchen was certainly the result of that. The house is located in a new development and came with a builder-grade offering of unremarkable cabinetry. The new design includes a few tweaks. One priority for this young mom was to have a very open feel to her kitchen. We even wanted to remove the wall between the kitchen and butler’s pantry. That was not to be as it turned out to be structural. Plan two was to open it up so that you could at least see through it. I think you’ll agree it worked really well.
 The cabinetry is by Holiday Kitchens, Inc. The door style is called Seattle and it is wood with white paint. Counter tops are white quartz and the dramatic backsplash is penny tile. A penny tile is a round penny-sized mosaic tile that comes in sheets for easy installation. Appliances include a full sized 36” refrigerator and freezer by SubZero, a built-in wall oven and a handy microwave drawer by Sharp. Now all you need is a sturdy pair of flip flops and a stylin pair of shades to complete the ensemble.


TIPS TO AVOID KITCHEN REMODEL RIPPOFFS

Seems like the consumer is a little leery lately. Everyone's radar is on high alert looking to avoid the big RIPOFF. I can only speak for myself but I'm confident that I am in the majority. All we kitchen and bath industry professionals want is to make you happy. Do we have to eat? Yes, and so do all the hard working people that make your life possible. That said, I do understand where you're coming from. After all, I am a consumer too. With that in mind I have come up with a cheat sheet for you. Run through these 5 tips as a prelude to your decision making and you should be able to trust once again. Oh and remember there is a difference between cheap and value for the money. I know cheap is tempting but it isn't cheap anymore if you have to replace a product that doesn't make the cut.
1. KNOWLEDGE IS POWER- Today there is no excuse not to educate yourself before you go shopping. There is a wide array of media at your disposal. Use the internet and talk to people! Yes, people, in person (ok can be online too). Talk to the experts. Read blogs. Ask questions and talk to other consumers. One of the best ways to feel good about your choices is to know other people who have made them before you and been happy. No, you can never know for sure but the more knowledge you have the more equipped you are to make the right selection for yourself.

2. RESEARCH-This goes hand in hand with #1 but it is really the next step. Once you have defined the scope of your project you will be ready to select specific products such as appliances, counter tops, cabinets etc. that fit into the big picture. Research the choices. What are other people saying? How long has a company been in business? The National Kitchen & Bath Association (NKBA) Consumer Reports and the Better Business Bureau are good national and local resources and can indicate if you're headed in the right direction.
3. TO THINE OWN SELF BE TRUE- Take a little time to find out what your style is. Who wants to spend a butt-load of money on something they're going to hate looking at? The best way to find what floats your boat is to do something I call "kitchen scrap booking". Time to have fun. Collect images from magazines, catalogs and the internet. These don't even have to be photos of kitchens. They should be anything that appeals to you, a style, product or just a general ambiance. In this way you will begin to see the patterns and perhaps even discover some things you never consciously knew! For example you may find that 7 of 10 photos contain white cabinetry but maybe you never considered that. Getting what you love is good value. It just takes a little vision.

4. LET THE PROFESSIONALS DO THEIR JOB- A WORD OF CAUTION: Don't get carried away here. You've all heard "a little knowledge is a dangerous thing". It's true. Never succumb to thinking you know it ALL. That's why there are people who have studied and spend a large part of their waking lives becoming certified experts so they can get paid to help you. Use them.
5. COMMUNICATE FOR GOD SAKES! Once you've got some semblance of a plan in your head it's time to take it (along with your scrapbook) to the magician professional who can make it happen for you. This is not about money. You have to buy your products somewhere and that place should have a professional on hand to take your vision and translate it into your dream. That's all we do folks. It is my experience that the best projects are really good collaborations between client and designer. Getting what you want equates to good value for money invested. The NKBA is a good source for qualified professionals in your area. Many of us are also willing to work on a consultation basis, so ask!

