Unless you've been living under a rock you know that the less-is-more look of the topless kitchen is hot!! When I say topless I mean no upper cabinets. There are certainly pluses and minuses to this design decision. But "how can I live without half my kitchen", you ask. Fear not. Today we will examine the possibilities.
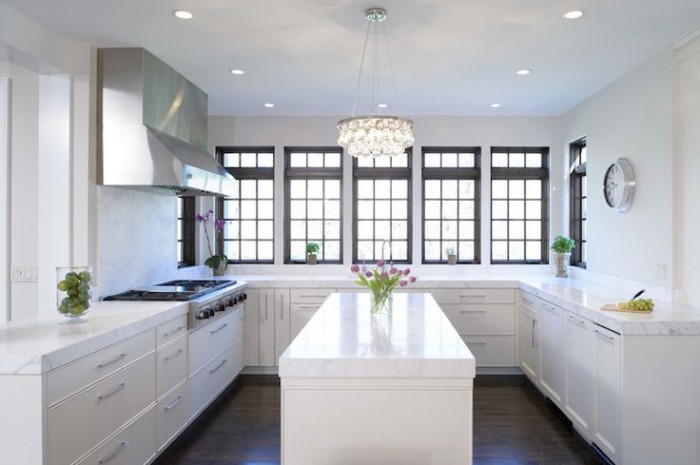
white kitchen, traditional kitchen, stainless steel hood, island, white countertop, kitchen windows, crystal chandelier,no upper cabinets
Less is Now
No complaining if you haven't done a thorough kitchen purge in the last year. We all have "stuff" and if it never sees the light of day it's stagnant energy taking up real estate that could be otherwise useful or beautiful.But what about dishes? They always go in the upper cabinets. Actually, dishes work perfectly in drawers if you have this drawer peg system. You'll find that they're easier to access too, particularly if you're short like me ;)

Dish drawer, dish pegs, black plates, drawer cabinet
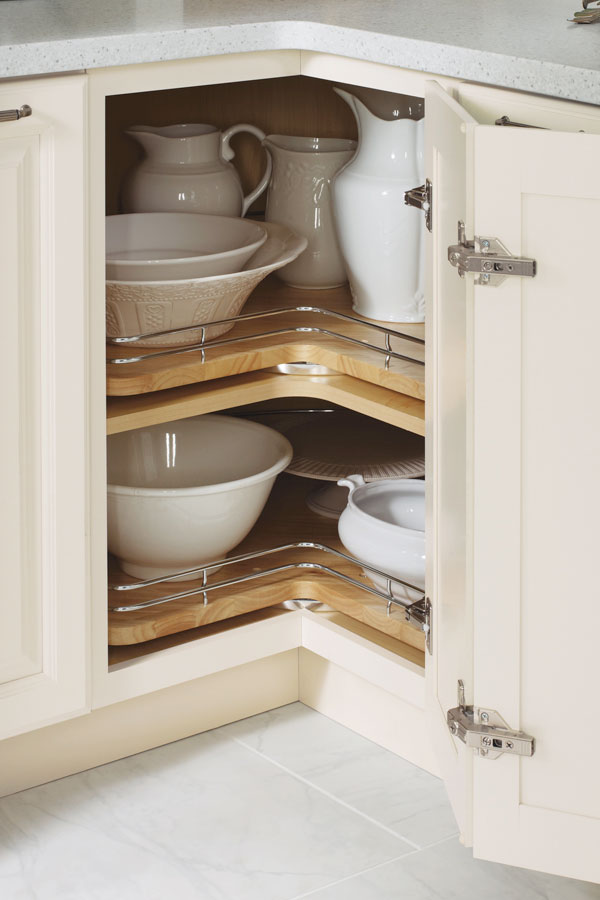
Clever Corners
Another way to maximize the space you have below deck is to use the corner space. My favorite way to do this is with a base lazy susan cabinet. It's versatile storage for almost anything. Just be sure to get this type, without the pole. With trays mounted on shelves, you won't lose things to the Twilight Zone if they fall over. (Chrome rails are optional) The only caveat is that you will need 36" on both sides of the corner to make this work.
base corner cabinet with lazy susan chrome rails
If you can't swing the 36" in each direction you can perhaps use the Cloud which fits in a blind corner cabinet. We can discuss more when you call me to help you with your new kitchen.
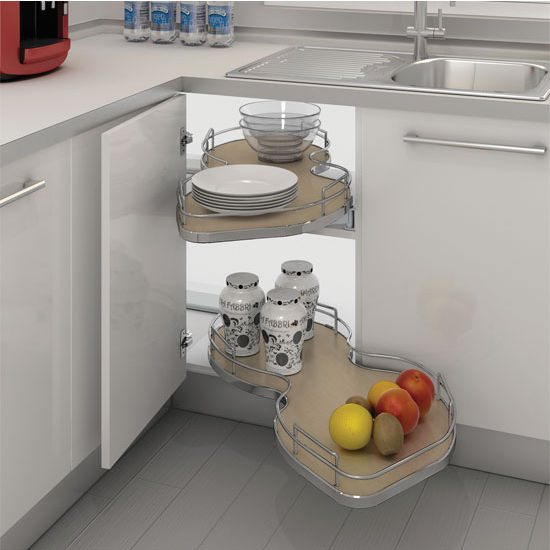
white cabinets, contemporary, chrome, blind corner cabinet, revashelf
Ultimate Simplicity
The most simple solution of all is the open shelf. They are both feared and widely popular. Some feel like it would look way too messy but I say it doesn't have to be all or nothing. A few open or floating shelves can add a lot of lightness and visual interest as well as storage above the counter in lieu of cabinets.
farmhouse kitchen, HGTV, white cabinets, apron sink, open shelves
Artful Arrangement
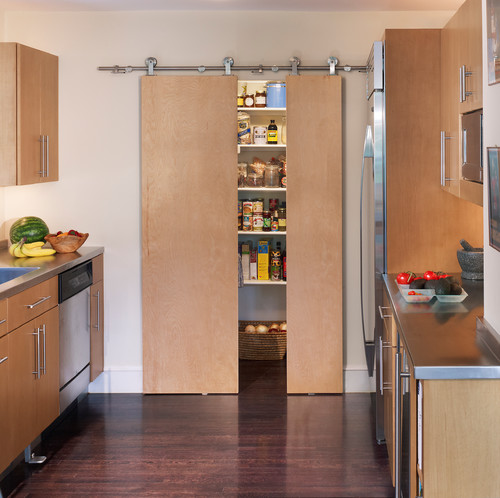
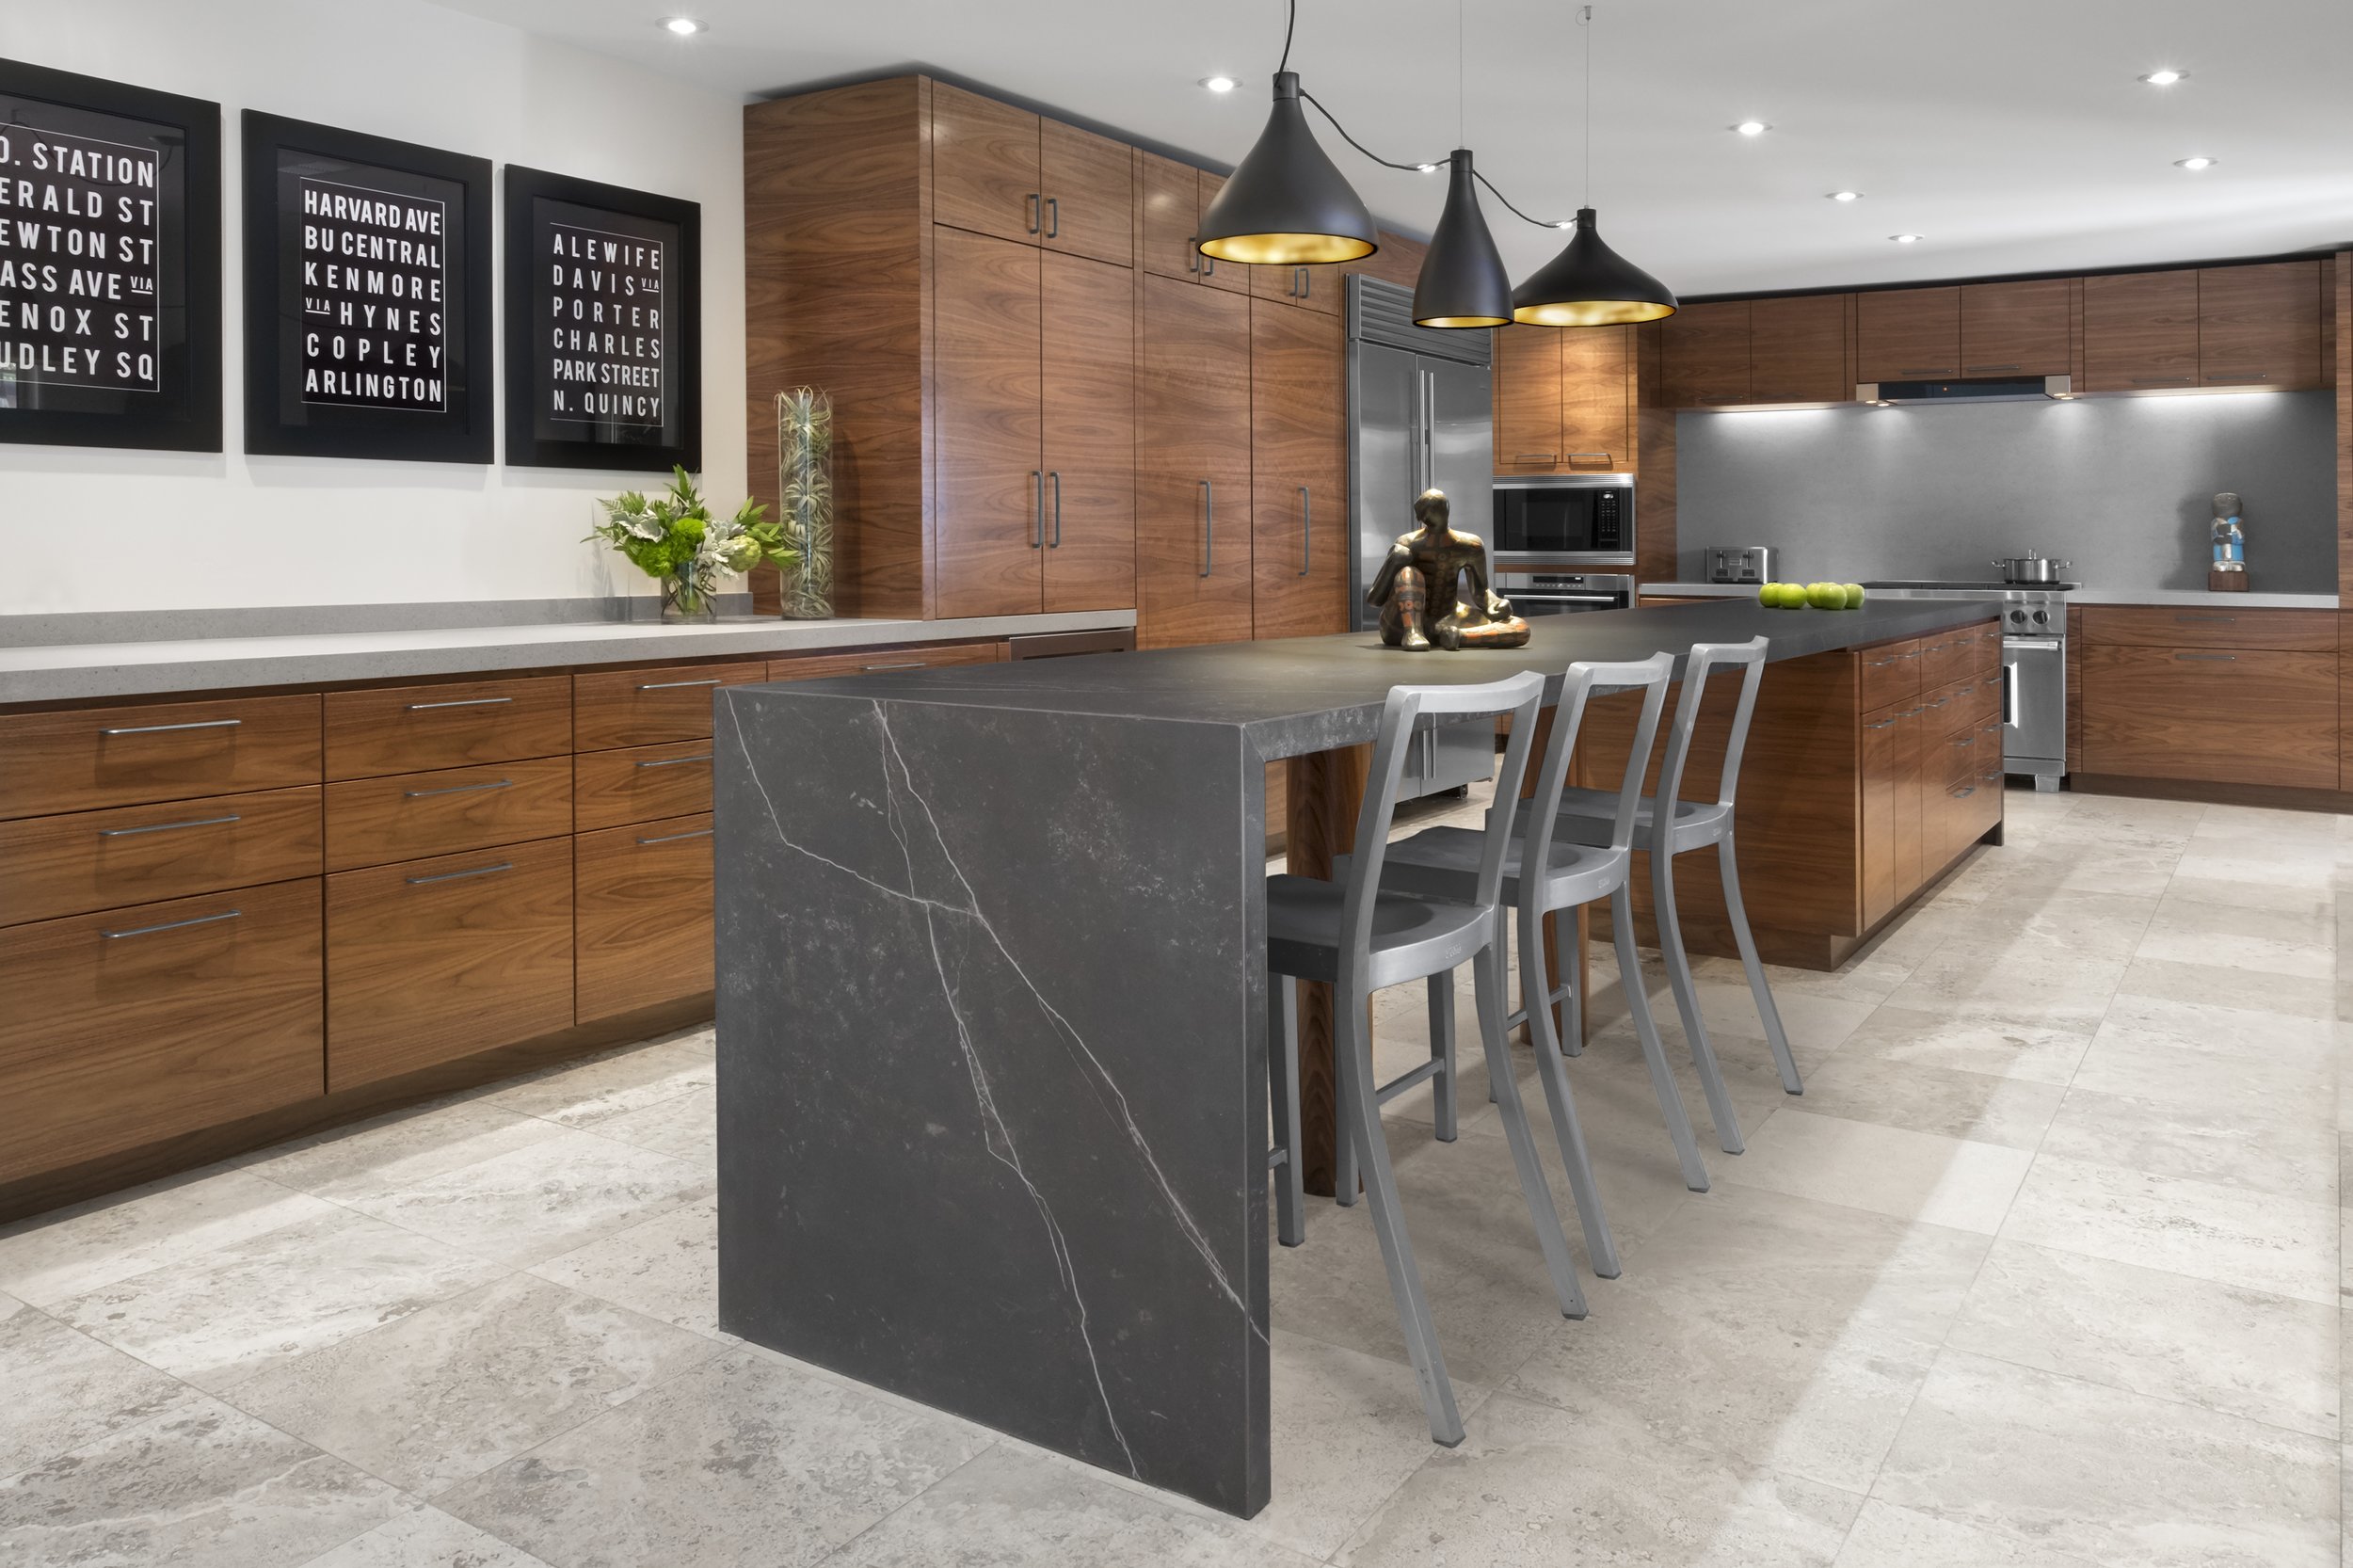
In the photo below, they actually did not eliminate uppers entirely but it feels like it. Here they are using the shortened uppers for remote storage, i.e. the stuff you don't need to access every day. The "go to" storage is in tall pantry cabinets. That's right, you don't have to use the pantry only for food, they are great for everything. If your pantry is full depth, like these, rollouts work great for easy access and to avoid items getting lost in the back. If you're observant you'll also notice the last cabinet sits on top of the counter. If you have the counter space this is a great way to conceal countertop items for less clutter.
contemporary kitchen Dekton wood cabinets pantries
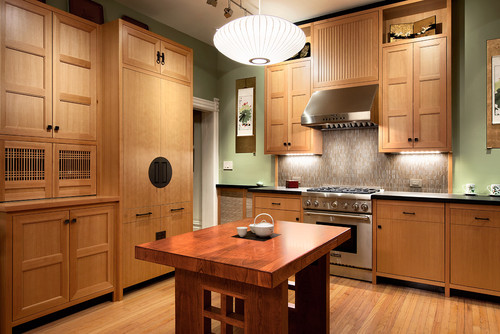
Creative Compromise
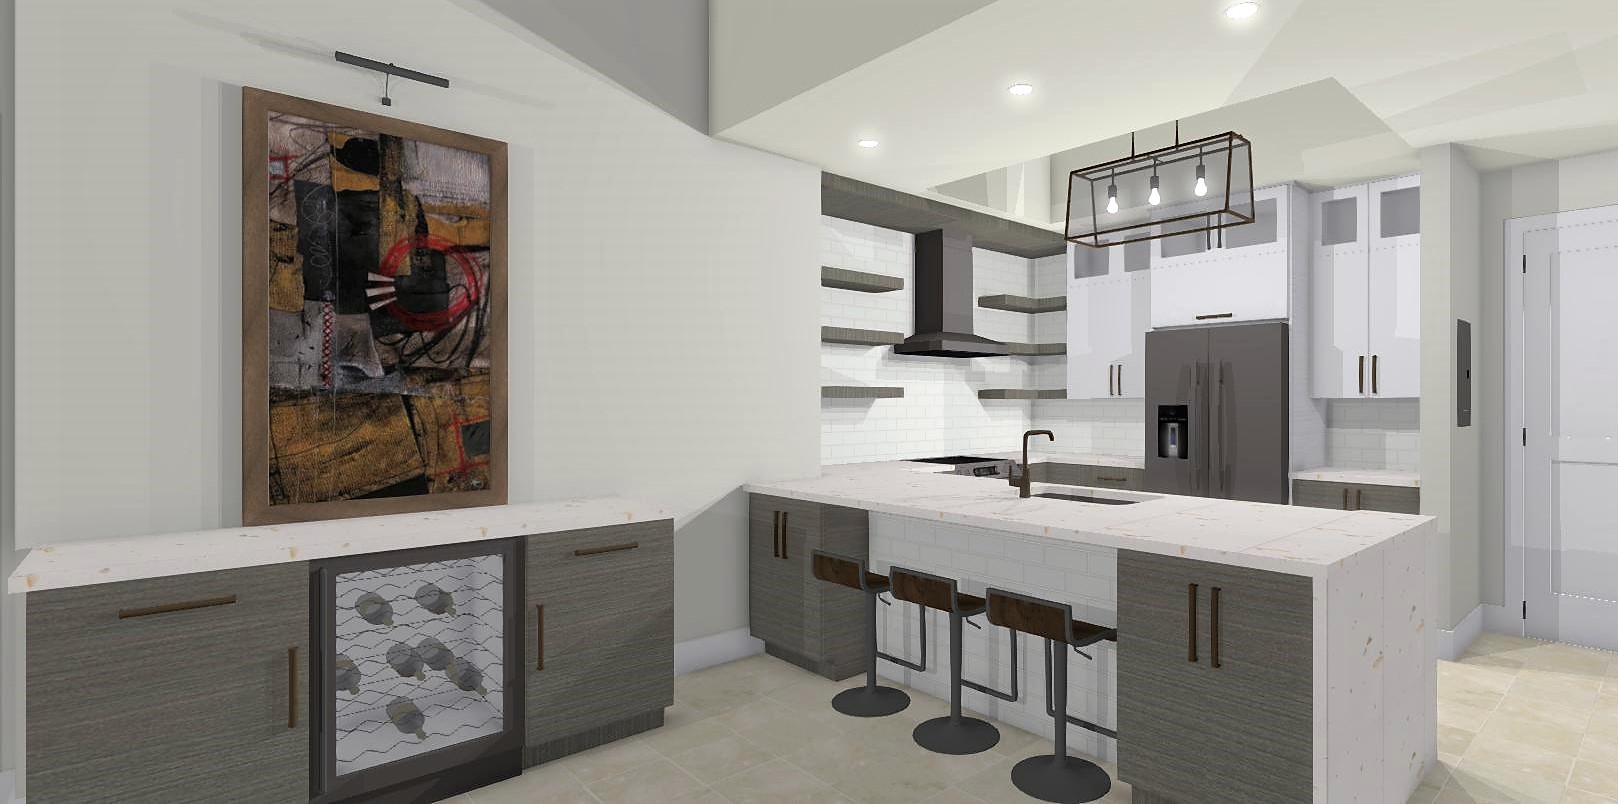
As we've seen, one does not necessarily need to banish the upper cabinet entirely to score an updated and functional result. Here is a loft kitchen I recently designed. My clients were in love with the idea of floating shelves and this look worked for their urban vintage style. Since space was at a premium in this condo we did opt to keep a few good sized upper cabinets. The look is actually a blend of contemporary and transitional. A full pantry also would've worked to the right of the refrigerator but my clients preferred this arrangement which is very symetrical and offers a bit of extra counter space. Hey, I always say the best jobs are good collaborations. :)
ArtfulKitchens 3DRendering kitchendesign
.
No matter what your situation, creativity can offer you choices. In over 20 years I have found that there is always a solution that will work in your space and I would love to help you find it.